A few days ago, I bought a new printer, since my last one out of the blue just stopped printing, showing an B200 error, which seems to be quite popular for Canon printers. FYI, this usually means that the print head has died.
That new printer hasn’t got an Ethernet adapter to connect it with the rest of the computers in my house, like the previous one had, only a wireless one (Wi-Fi). Since there is no wi-fi coverage at the room where I installed the new printer, I had to find a way to share it to the network.
Setting up a Raspberry Pi 3 as a middle man between the printer (wirelessly) and the switched network (wired) was a good choice, but that was very simple(!). Alternatively, I could connect the printer to the Raspberry Pi via USB, set up a samba server on its Raspbian and share the printer to the network through that. But, to be honest, I didn’t like that option either cause I didn’t want to waste a Raspberry Pi just for that. I had to find some other device to do this job. And I had just the thing: An old-ish ADSL router (ZTE H108NS) that was sitting in a drawer.
I quickly fired it up and disabled all unwanted features from its web interface, but there were still services left on from within the operating system that I had no access to them.
Looking under the hood
There was no ssh or telnet server running on the router, so I decided to open up the case and look for a way that I could use, to gain access to the system. Luckily, there were 4 unpopulated pins on the front left side that looked very promising. Maybe a serial interface? I soldered some headers and I connected my bus pirate to them in various combinations. After a few tries, that was indeed a serial interface (UART)!
Below, you can see the pinout of the aforementioned interface:
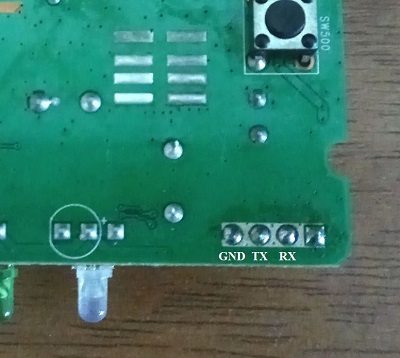
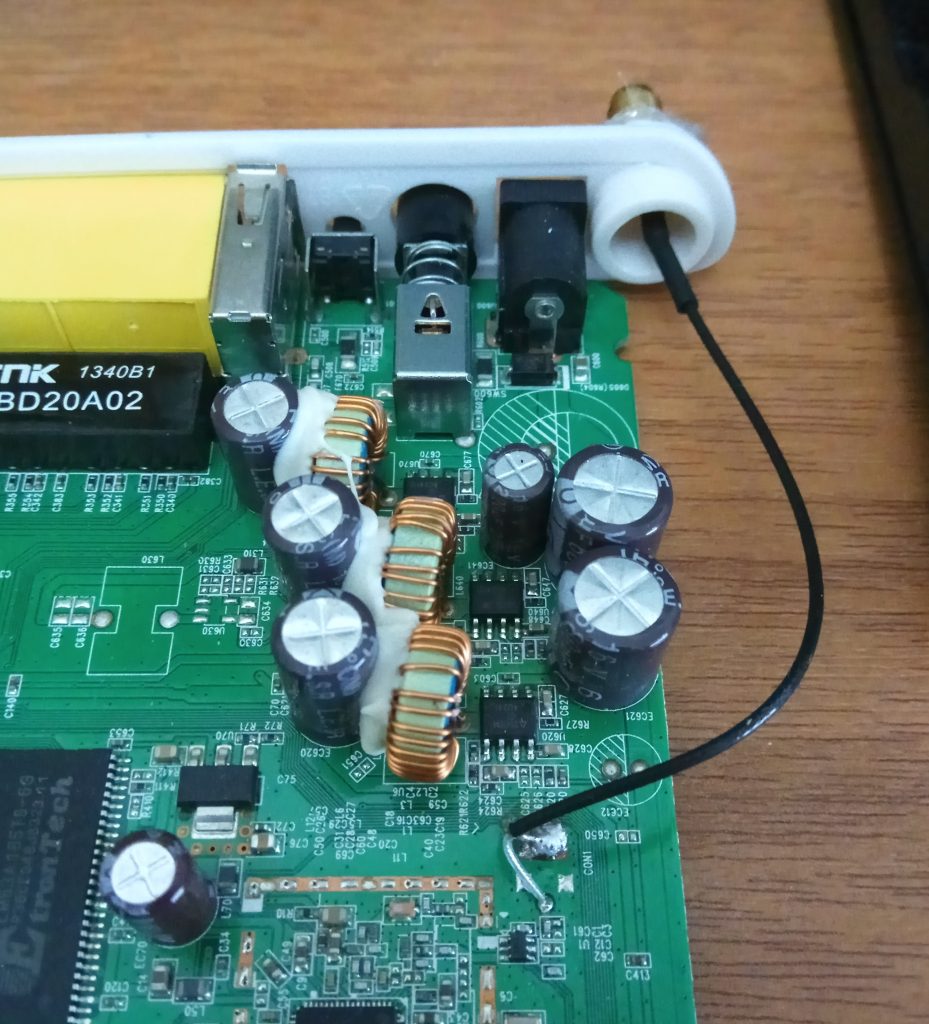
While I was at it, I also replaced the built-in antenna with a PCB pigtail jumper cable with an RP-SMA female jack on its end, so that I can connect an external antenna to it and potentially improve the wireless coverage/reception.
Back to the bus pirate connections (with the router powered on):
| Bus pirate signal | Router serial pin |
|---|---|
| GND | GND |
| MOSI | RX |
| MISO | TX |
Then, I launched my favorite serial terminal application, TeraTerm, and after connecting to the serial port of my bus pirate, I issued the following commands:
HiZ>m
 HiZ
 1-WIRE
 UART
 I2C
 SPI
 2WIRE
 3WIRE
 LCD
 x. exit(without change)
 (1)>3
 Set serial port speed: (bps)
 300
 1200
 2400
 4800
 9600
 19200
 38400
 57600
 115200
 BRG raw value
 (1)>9
 Data bits and parity:
 8, NONE *default
 8, EVEN
 8, ODD
 9, NONE
 (1)>
 Stop bits:
 1 *default
 2
 (1)>
 Receive polarity:
 Idle 1 *default
 Idle 0
 (1)>
 Select output type:
 Open drain (H=Hi-Z, L=GND)
 Normal (H=3.3V, L=GND)
 (1)>
 Ready
 UART>(0)
  0.Macro menu
  1.Transparent bridge
  2.Live monitor
  3.Bridge with flow control
  4.Auto Baud Detection
 UART>(3)
 UART bridge
 Reset to exit
 Are you sure? y
And then, I was presented with a nice login prompt, where I entered router’s default admin credentials and got a root shell:
login: admin
Password:
#

# uname -a
 Linux  2.6.22.15 #1 Thu Jul 16 17:25:08 CST 2015 mips unknown

# cat /proc/cpuinfo
 system type             : TrendChip TC3162U SOC
 processor               : 0
 cpu model               : R3000 V0.1
 BogoMIPS                : 330.95
 wait instruction        : no
 microsecond timers      : no
 tlb_entries             : 32
 extra interrupt vector  : no
 hardware watchpoint     : no
 ASEs implemented        :
 shadow register sets    : 1
 VCED exceptions         : not available
 VCEI exceptions         : not available
 unaligned accesses      : 204
At this point, I thought I could do just about anything I wanted to. Like edit configuration files, add/remove software, etc. Sadly, the embedded Linux system was very limited in terms of supported commands. There wasn’t even a text editor available. Nonetheless, I did a couple of changes to some configuration files using echo/sed/cp commands in order to test it and then I restarted the router. All my changes were lost. And that happened because the filesystem is being restored on every boot. This meant that I had to do the actual changes to the firmware image itself and then flash the device with that.
Fiddling with the firmware
After some googling, I found out the blog of a guy called vasvir, who had done some amazing research regarding this device. I really wish I have seen his posts earlier…
Basically following vasvir’s steps, I managed to do these modifications to the system:
- Removed the services I won’t be needing, like tr69/cwmp and bftpd
- Compiled a second busybox executable in order to add the following commands: addgroup, adduser, chattr, chown, chroot, clear, crond, crontab, delgroup, deluser, df, diff, du, fdisk, hexdump, httpd, hush, id, lash, less, mkfifo, modprobe, msh, nc, seq, sort, strings, sync, tail, telnet, time, touch, tr, uniq, unzip, vi, watch, wc, wget, which, whoami, xargs
- Disabled the “DSL” LED
- Enabled telnetd and crond services
- Set the transmit power of the wireless adapter to the lowest setting (I only needed the printer next to it to be able to connect to the router)
- Couple of “very useful” aesthetic changes, like this one
Without making this post even longer, I will briefly describe how I did some of those changes, in case it might help someone else who comes across that.
Started by getting the latest (last) firmware for this device from the greek ISP and after extracting the downloaded archive, I got the tclinux.bin file. From the firmware-mod-kit, run “./extract-firmware.sh tclinux.bin” to extract the firmware (duh). You should find the extracted filesystem in ./firmware-mod-kit-master/fmk/rootfs. Now we are ready to edit/add/remove files.
So, let’s move on to the actual modifications.
Replaced ./userfs/bin/tr69 with a blank bash file (containing only the “#!/bin/sh” line).
Removed everything with the words “OTE”, “CWMP” and “TR69” from the file ./userfs/profile.cfg.
I commented out everything in ./usr/etc/inetd.conf (specifically, the bftpd line that was left on).
In the usr/etc/init.d/rcS I did the following changes.
Removed these:
< if [ "$TCSUPPORT_RA_MENU" != "" ] ;then
<     utelnetd -l /userfs/bin/ra_menu -d
< else
<     utelnetd -l /bin/login -d
< fi
...
< #tftp server
< /userfs/bin/tftpd &
...
< if [ "$TCSUPPORT_CZ_OTE" != "" ] ;then
< echo "killall -9 utelnetd!!!"
< killall -9 utelnetd
< fi
Added these:
> # TELNET
> /usr/bin/utelnetd -d
>
> # set the wlan power to the lowest setting
> wlanphxcmd txpwr set -p 1
>
> # crond
> /bin/mkdir -m 0777 -p /var/spool/cron/crontabs
> /bin/crond -L /var/log/crond.log -b
In the userfs/led.conf I replaced these lines:
 < 3     6   2   3   0
 < 4     6   2   0   0
 < 5     6   2   0   0
with these:
> 3     6   0   0   0
> 4     6   0   0   0
> 5     6   0   0   0
essentially disabling the blinking DSL LED.
In order to build the busybox executable, I, again, followed vasvir recommendations and I got this system image, where after extracting it, I resized the filesystem, cause, by default, its free space wasn’t sufficient to fit any additional files:
cd system-image-mips
dd if=/dev/zero of=image-mips.ext2 bs=1M count=80 oflag=append conv=notrunc
e2fsck -f image-mips.ext2
resize2fs image-mips.ext2
and then I run the ./run-emulator.sh script to launch the emulated system.
To copy files from/to my host system, I quickly set up vsftpd to the host and from the guest (mips) system I could use the following commands:
# Get busybox-1.4.2.tar.bz2 archive from the host
ftpget -u ftpuser -p ftppass 10.0.2.2 busybox-1.4.2.tar.bz2 busybox-1.4.2.tar.bz2
# Put the compiled busybox2 executable to the host
ftpput -u ftpuser -p ftppass 10.0.2.2 busybox2 busybox2
The build of busybox2 was quite straight-forward.
make config
make
The only time-consuming thing was to enable only the commands that were missing from the router. If someone is interested here is the generated .config file after running the make config command and selecting the required (for me) applets.
Added the busybox2 in the bin directory and run the following commands:
 cd ./bin
 chmod a+x busybox2
 ln -sf busybox2 addgroup
 ln -sf busybox2 adduser
 ln -sf busybox2 chattr
 ln -sf busybox2 chown
 ln -sf busybox2 chroot
 ln -sf busybox2 clear
 ln -sf busybox2 crond
 ln -sf busybox2 crontab
 ln -sf busybox2 delgroup
 ln -sf busybox2 deluser
 ln -sf busybox2 df
 ln -sf busybox2 diff
 ln -sf busybox2 du
 ln -sf busybox2 fdisk
 ln -sf busybox2 hexdump
 ln -sf busybox2 httpd
 ln -sf busybox2 hush
 ln -sf busybox2 id
 ln -sf busybox2 lash
 ln -sf busybox2 less
 ln -sf busybox2 mkfifo
 ln -sf busybox2 modprobe
 ln -sf busybox2 msh
 ln -sf busybox2 nc
 ln -sf busybox2 seq
 ln -sf busybox2 sort
 ln -sf busybox2 strings
 ln -sf busybox2 sync
 ln -sf busybox2 tail
 ln -sf busybox2 telnet
 ln -sf busybox2 time
 ln -sf busybox2 touch
 ln -sf busybox2 tr
 ln -sf busybox2 uniq
 ln -sf busybox2 unzip
 ln -sf busybox2 vi
 ln -sf busybox2 watch
 ln -sf busybox2 wc
 ln -sf busybox2 wget
 ln -sf busybox2 which
 ln -sf busybox2 whoami
 ln -sf busybox2 xargs
 chown 11408:10513 *
To build our new firmware these are the required steps, using the awesome tcrevenge utility from vasvir:
mksquashfs-lzma ./firmware-mod-kit-master/fmk/rootfs/ ./squashfs-root.sp-1.7u
dd if=tclinux-orig.bin of=kernel-1.7u skip=256 count=`/usr/bin/binwalk tclinux-orig.bin | awk '/Squash/ {print $1 - 256;}'` bs=1
./tcrevenge -m '3 6035 122 89' -k ./kernel-1.7u -s ./squashfs-root.sp-1.7u -o header-1.7u -p padding-1.7u
cat header-1.7u kernel-1.7u squashfs-root.sp-1.7u padding-1.7u > tclinux.bin
Now, we can upload the new tclinux.bin file using the web interface of the router, in Maintenance -> Firmware page.
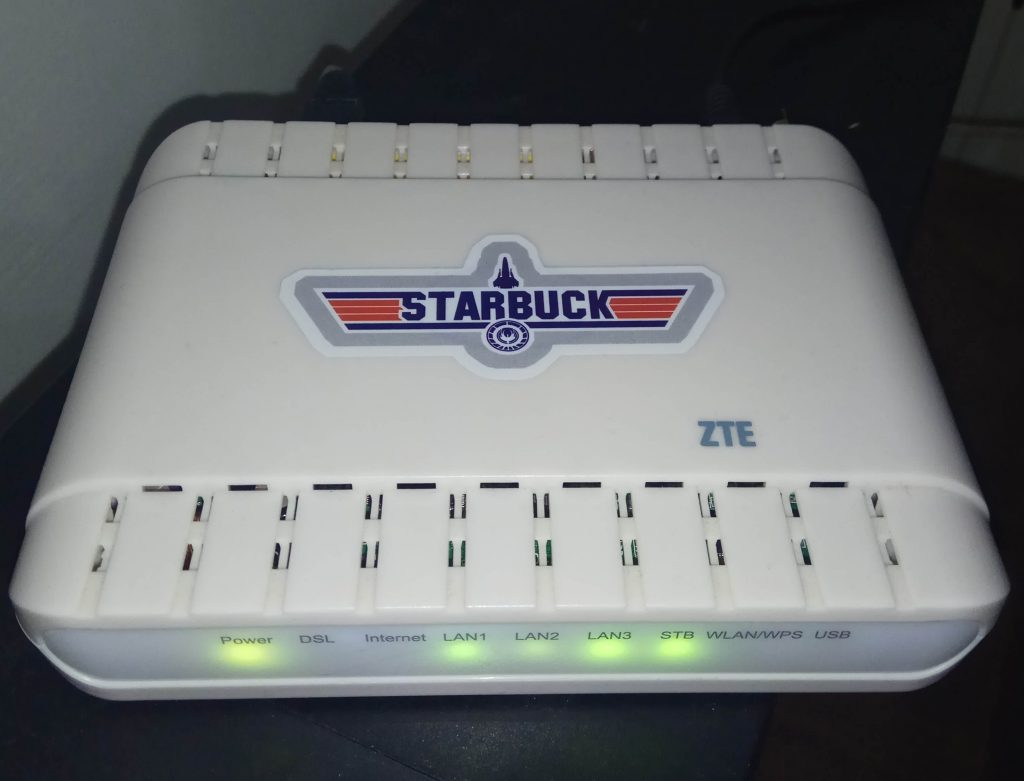
Finally, I also re-branded the device! Meet “Starbuck”! 😛
Oh yeah, at this point I should also add some disclaimer: I am not responsible if you brick your device using the provided instructions, use at your own risk, blah blah.
I made this tool some time ago that may be helpful the next time you hack around with this device 😀
https://github.com/kr105/tclinux-studio
Do you have the modified firmware as a .bin file? Because the one I created cannot be flashed in my ZTE H108NS (fw 1.27). I get the error “The file is illegal file, please to upload again!” 🙂
If you do not want to post it here as a link, could you please send it to me via email?
Thanks x1000!
Sent it via e-mail. Let me know if it works for you.
could you please send it to me via email?
I also got the “The file is illegal file, please to upload again!”
I am not able to troubleshoot it because I don’t really know why it does not accept it. If you can also send a working version to me I would be more than grateful!
could you have the modified firmware as a .bin file please send it to me via email
Hi!
I would also be very gratefull if you could send me the bin file via email.
Thanks!